2048 x 2048 and Under 300 KB: Shopify Image Sizes for Merchants
Use 2048 x 2048 pixels for product master images, keep product files under roughly 200 to 300 KB as recommended, and upload JPEGs; Shopify automatically converts them to WebP for browsers that support it. The platform allows uploads up to 5000 x 5000 pixels and 20 MB, but that ceiling exists for edge cases, not daily use. Anything below 800 x 800 pixels disables the zoom feature shoppers expect on a product page.
TL;DR:
Use 2048 x 2048 pixels for product images to ensure high resolution and effective zoom functionality on desktop and retina screens.
Keep individual product files below 300 KB at 70-80% JPEG quality to balance image sharpness with fast load times.
Upload JPEGs for photos and PNGs only when transparency is necessary, as Shopify automatically converts suitable formats to WebP for faster delivery.
Design mobile images with focal points inside the central 60% of the frame and consider separate mobile-optimized banners for better user experience.
Professional photography is recommended for high-traffic or complex products where consistent lighting, color accuracy, and lifestyle context impact conversions.
ProductphotoCreate Product Images Built for ShopifyProductphoto creates conversion-optimized product photography, from detailed product shots to lifestyle images and infographics for e-commerce brands.Explore Productphoto
Table of Contents
Shopify Image Size Cheat Sheet by Type
Which File Format Should You Use for Shopify Images?
How Does Shopify Handle Uploaded Images After You Upload Them?
Designing Images That Work on Mobile Screens
Preparing and Uploading Shopify Images Without Redoing the Work Later
When Pixel-Perfect Sizing Still Isn’t Enough
Three Rules That Actually Move the Needle
Where ProductPhoto Fits if You’d Rather Not Do This Yourself
Where to Verify These Specs Yourself
Sources
FAQ
Shopify Image Size Cheat Sheet by Type
Every image on a Shopify store does a different job, and treating them all the same is how stores end up with a blurry hero banner sitting next to an oversized product shot that takes three seconds to load. Here’s the breakdown merchants can hand straight to a designer or photographer without further explanation.
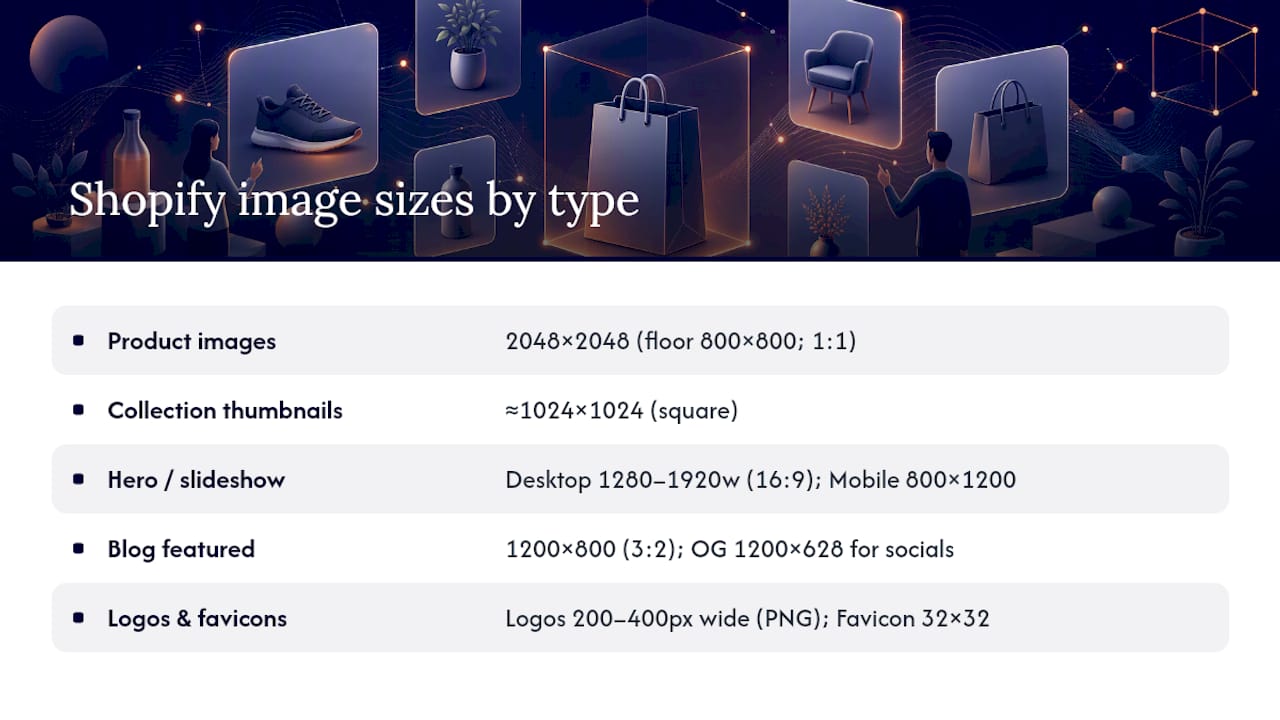
Product and variant images are recommended to be exported at 2048 x 2048 pixels in a 1:1 ratio. That size gives Shopify’s zoom feature enough resolution to work properly on desktop and satisfies retina displays on phones and tablets. The floor is 800 x 800 pixels; below that, Shopify disables zoom entirely, which quietly kills a feature shoppers use to inspect fabric texture, stitching, or fine print before buying.
Collection thumbnails work best around 1024 x 1024 pixels, also square. Consistency matters more than raw resolution here. A collection grid with mismatched aspect ratios looks unfinished even if every individual photo is sharp.
Hero images and slideshow banners need more nuance because they stretch across the full width of a screen. Desktop versions typically run around 1280 to 1920 pixels wide in a 16:9 ratio, while mobile often uses versions closer to 800 x 1200 in portrait orientation, so text and product focal points don’t get cropped off on a phone screen.
Blog featured images typically are around 1200 x 800 pixels in a 3:2 ratio. For sharing posts on social platforms, 1200 x 628 pixels is a commonly recommended Open Graph size that keeps previews from looking cropped on Facebook or LinkedIn.
Logos and favicons follow their own rules. Logos are recommended as PNG files with transparency, roughly 200 to 400 pixels wide. Favicons are typically 32 x 32 pixels, since browsers just need something recognizable in a tab.
These file-size targets come from a mix of current guidance and observed practice across merchants who’ve optimized for speed without sacrificing sharpness, as Craftshift’s 2026 breakdown lays out in more depth.
Which File Format Should You Use for Shopify Images?
JPEG is the default choice for product photography and lifestyle shots with continuous color gradients. PNG is preferred when transparency is needed, think logos, badges, or icon overlays, since JPEG can’t handle a transparent background. SVG works for vector graphics like line icons that need to scale without pixelation, and GIF still has a narrow use case for simple looping animations, though it’s largely obsolete for anything else.
Here’s what a lot of merchants don’t realize: you don’t actually need to manually create WebP files. Shopify accepts JPEG, PNG, PSD, TIFF, BMP, GIF, SVG, and HEIC uploads, then automatically serves WebP to any browser that supports it. Upload a clean JPEG and Shopify handles the format conversion on the delivery side.
For export settings, aim for JPEG quality between 90 and 95 percent with standard chroma subsampling. That range is nearly indistinguishable from a 100 percent quality export to the human eye, but the file size drops dramatically, often by half or more. Resize your master file to 2048 pixels on the long edge before exporting rather than uploading a massive 6000 pixel camera file and hoping Shopify sorts it out.
Use JPEG for photos, PNG for transparency, SVG for scalable icons.
Export at 90-95% quality with standard compression, not “maximum” settings.
Keep a lossless master (PSD or TIFF) in case you need to re-edit later.
Tools like Adobe Photoshop’s “Save for Web,” Squoosh, or TinyPNG all handle this compression cleanly.
If you can see blocky artifacts around text or fine edges, drop the compression level down 5 to 10 percent and re-export.*
Lossy compression is fine for the vast majority of product photography because JPEG’s algorithm targets the kind of detail loss human eyes barely notice in photos. Keep a lossless version only if you plan to print the image or need to re-crop it heavily down the road.
How Does Shopify Handle Uploaded Images After You Upload Them?
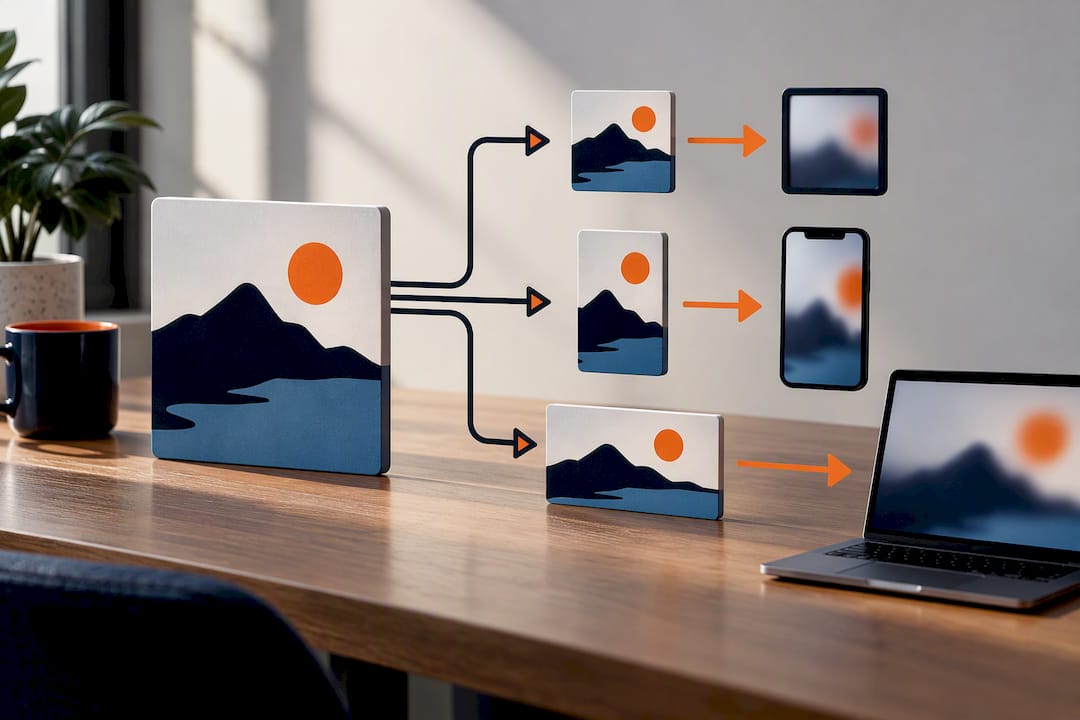
Shopify processes every uploaded image through its content delivery network, automatically generating resized variants and serving the most appropriate one for the visitor’s device and browser. Upload a 2048 x 2048 pixel master, and Shopify’s CDN creates smaller versions for thumbnails, mobile views, and anything else the active theme calls for. You never have to manually export five different sizes of the same photo.
That automatic system is also why oversized uploads waste effort rather than improving quality. Shopify’s product media limits cap uploads at roughly 5000 x 5000 pixels or 25 megapixels and 20 MB per file, but themes and zoom features typically max out well below that ceiling. Uploading a 6,000 pixel file doesn’t buy sharper zoom. It just adds processing time and storage overhead for no visible benefit.
Worth noting: upload limits aren’t identical across every part of a Shopify store. Theme assets like background images or section graphics sometimes carry different caps than product media does, so it pays to check the specific limit for whichever image type you’re placing.
2048 x 2048 px is the practical sweet spot for retina screens and zoom without wasted overhead.
Shopify’s CDN generates resized variants automatically. You don’t need to pre-export multiple sizes.
Compatible browsers receive WebP automatically, even though you uploaded a JPEG.
Product media and theme assets can have different upload caps, so verify before batch uploading.
Designing Images That Work on Mobile Screens
Most Shopify storefront traffic comes from mobile phones, based on platform usage data tracked by Statcounter, which means an image that looks great on a 27 inch monitor can crop out exactly the detail a phone shopper needed to see. Designing with a mobile-first mindset isn’t optional polish anymore. It’s the default case.
Keep any text, logos, or calls to action inside the central 60% of the canvas. Themes crop banner edges differently depending on screen width, and anything near the border risks getting sliced off on a narrow phone screen.
Supply a separate mobile-optimized image for hero banners and slideshows rather than relying on a single image for all screen sizes. A portrait crop around 800 x 1200 pixels is usually better for mobile than a squeezed widescreen banner.
Match aspect ratio to product category. Square 1:1 works as a universal default, but apparel often reads better at 2:3 to show the full length of a garment, and furniture tends to need 4:3 to capture scale and context.
Lean on responsive image techniques, srcset attributes, lazy loading for below-the-fold images, and prioritized loading for the hero image, so the browser only downloads what a given screen actually needs.
Pro Tip: Open your homepage on an actual phone, not just a resized browser window, and check whether your hero image’s focal point (the product, the model’s face, the key detail) survives the crop. Browser emulators lie more often than people expect.
Preparing and Uploading Shopify Images Without Redoing the Work Later
A consistent export workflow saves hours of rework down the line, especially once a catalog grows past a hundred SKUs. Start every product photo as a layered master file, PSD or a similar format, saved at a resolution comfortably above 2048 pixels so you’re always scaling down rather than up.
Export your final web-ready JPEG at 2048 pixels on the long edge, with quality between 70 and 80 percent, from that master file.
Name files clearly and consistently, something like
product-name-blue-front.jpg. Avoid suffixes like “_small” or “_thumb” in filenames, since some scripts and CDNs interpret those tags in unexpected ways and it just adds confusion during batch uploads.Build a batch-export preset in your editing software so every image in a shoot gets identical treatment, same dimensions, same quality setting, same color profile.
After uploading, check the live product page on both a phone and a desktop, and run the page through a tool like Google’s PageSpeed Insights to confirm the images aren’t dragging load times.
Keep archive copies of your full-resolution originals for any future use like print catalogs, trade show banners, or redesigns that need higher resolution.
When Pixel-Perfect Sizing Still Isn’t Enough
Getting the dimensions right solves half the problem. The other half is what’s actually in the frame, and that’s where a lot of DIY product photography quietly falls short even when every file is exported at the correct size.
A few things worth checking before a shoot goes live on your store:
Every image in a product gallery uses the same aspect ratio and the same lighting setup, so switching between photos doesn’t feel jarring.
Colors are accurate and consistent across the whole set. Nothing kills conversion faster than a return because the “navy” sweater arrived looking black.
At least one lifestyle image pairs with your on-white product shots, since context (a bag on someone’s shoulder, a mug on a kitchen counter) helps shoppers picture ownership in ways a plain background can’t.
Feature-dense products get an infographic, not just more photos, when a spec sheet or size chart needs to communicate fast.
Merchants running high-velocity SKUs, products where exact color or scale perception drives return rates, or anything needing complex styling usually see the DIY approach hit a ceiling fast. That’s when professional catalog photography starts paying for itself instead of just adding cost. When you do hire a photographer, ask for final JPEG masters delivered at 2048 pixels, along with transparent PNG versions of any logo or icon assets, and clear usage terms in writing.
Three Rules That Actually Move the Needle
Most of the technical detail around image sizing boils down to three habits. Export product masters at 2048 pixels, always. Keep individual product files under 300 KB, since that’s the range where quality and load speed both hold up. And reach for PNG only when you genuinely need transparency, not as a default format for every image.
On the investment question: professional photography tends to pay off fastest on your highest-traffic SKUs and anywhere returns are being driven by color or fit confusion, not across an entire catalog on day one.
— Sam
Where ProductPhoto Fits if You’d Rather Not Do This Yourself
Getting every product shot to a consistent 2048 x 2048 pixel standard, with matching lighting and color across an entire catalog, takes real time even with a solid workflow. Productphoto handles that end to end: on-white product photography for clean, consistent grids, lifestyle shots for hero banners and context images, 360 spins for products where shoppers want to see every angle, and custom infographics for anything with specs worth calling out.

The ordering process is designed to be efficient and online-based, aiming for fast turnaround times to handle catalogs without extended delays in production. When you place an order, ask specifically for final JPEG masters at 2048 pixels, transparent PNG files for any logo or icon work, and confirmation of royalty-free usage rights so the images are cleared for your store, ads, and marketplace listings without restriction. If you’re prepping a batch of SKUs for a Shopify relaunch, the Starter and Pro Listing Packages are built for exactly that kind of project.
Where to Verify These Specs Yourself
For the most current limits and behavior, check Shopify’s own image size guidelines and its product media documentation directly, since platform specs shift over time.
Sources
FAQ
How Do I Resize an Image for Shopify?
Use an editor like Photoshop, GIMP, or a free tool like Squoosh to resize the image so its longest edge is 2048 pixels, then export as a JPEG at 70 to 80 percent quality. Keep the aspect ratio square (1:1) for product photos unless the specific image type calls for something else, like a 16:9 banner.
Which Image Format Is Best for Shopify?
JPEG is the best format for product and lifestyle photography, while PNG is better when you need a transparent background, like for a logo. You don’t need to manually create WebP files. Shopify automatically converts and serves WebP to browsers that support it.
What Aspect Ratio Is Best for Shopify?
A 1:1 square ratio works as the universal default for product images and collection thumbnails because it displays consistently across every theme. Banners and hero images typically use 16:9 on desktop, while apparel photography often looks better in a 2:3 vertical crop.
What Is the Ideal Image Size for Shopify Products?
The ideal size is 2048 x 2048 pixels, which supports retina displays and Shopify’s zoom feature without unnecessary file weight. The minimum for zoom to activate at all is 800 x 800 pixels, and files should stay under roughly 200 to 300 KB for fast load times.
Do I Need Professional Photography if I Follow These Size Specs?
Correct sizing alone won’t fix inconsistent lighting, inaccurate color, or a lack of lifestyle context that helps shoppers picture the product in use. For catalogs with complex styling needs or high-return-rate items, working with a service like Productphoto’s catalog photography often closes that gap faster than an in-house DIY setup.
Recommended
Made with BabyLoveGrowth to improve Google and AI visibility